New! Upgraded Capture Sequences
The upgraded RxPhoto Custom Capture Sequences allow practice to create Custom Capture Sequences using any of RxPhoto's on-screen guides. With the update, practices can create Custom Capture Sequences with more specificity. For example:
-
Botox (with expressions)
-
Lip Fillers
-
Face & Neck Treatments
-
Neck & Chest Treatments, etc.
RxPhoto has also added new default body areas including:
-
Gluteus
-
Lips
-
Neck
-
Upper Body/Chest
-
Armpits
-
Full Body
As you read through this article you may expand screenshots by clicking on the image you would like to expand. Each section also includes a short video tutorial.
New Custom Capture Sequences - Video Tutorial
Custom Capture Sequences Layout
Custom Capture Sequences can be created and edited on the
RxPhoto Website
, which is accessible from any computer browser.
1. Log in to the
RxPhoto Website
from any computer browser.
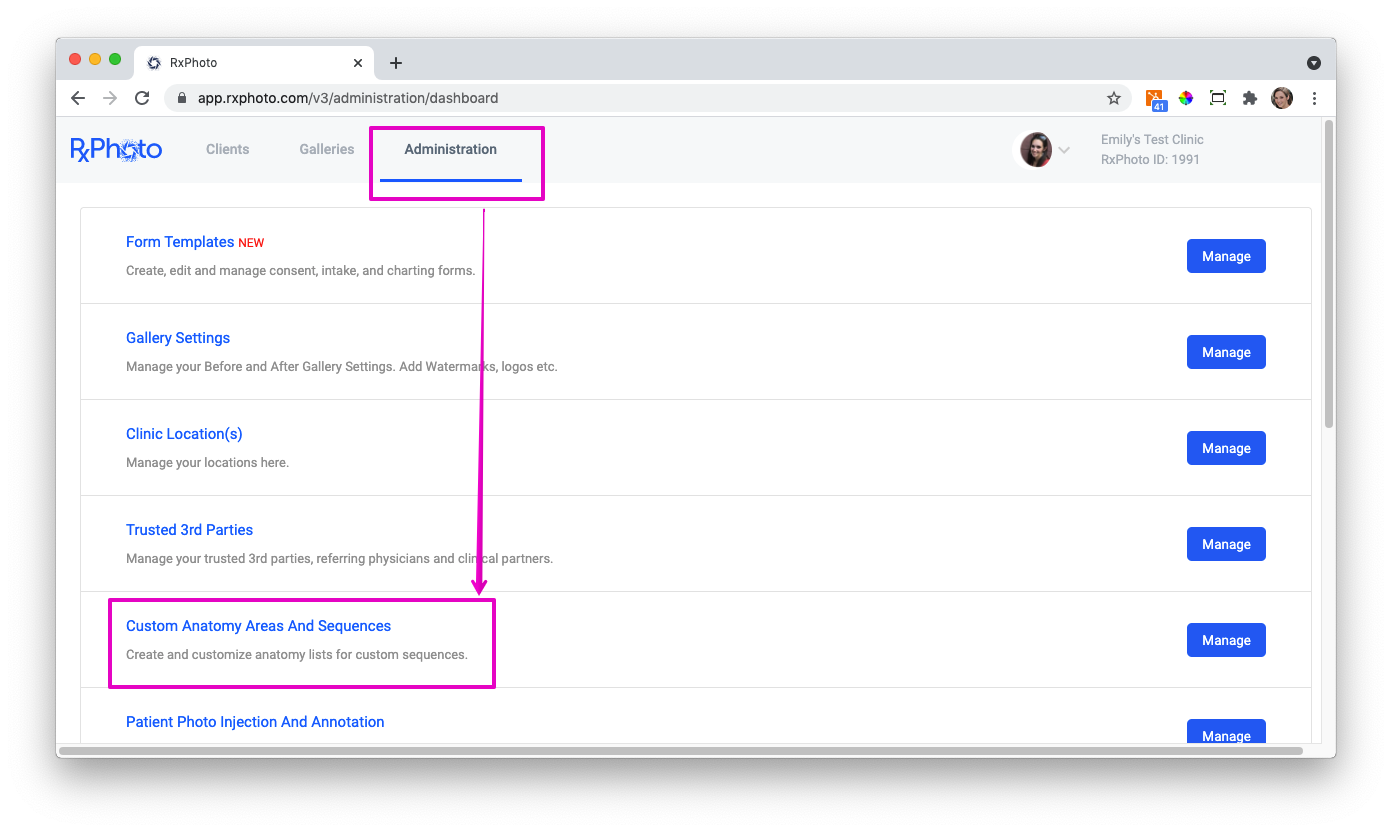
2. Navigate to the Administration tab at the top of the screen
3. Click to enter "Custom Anatomy Areas and Sequences."
-
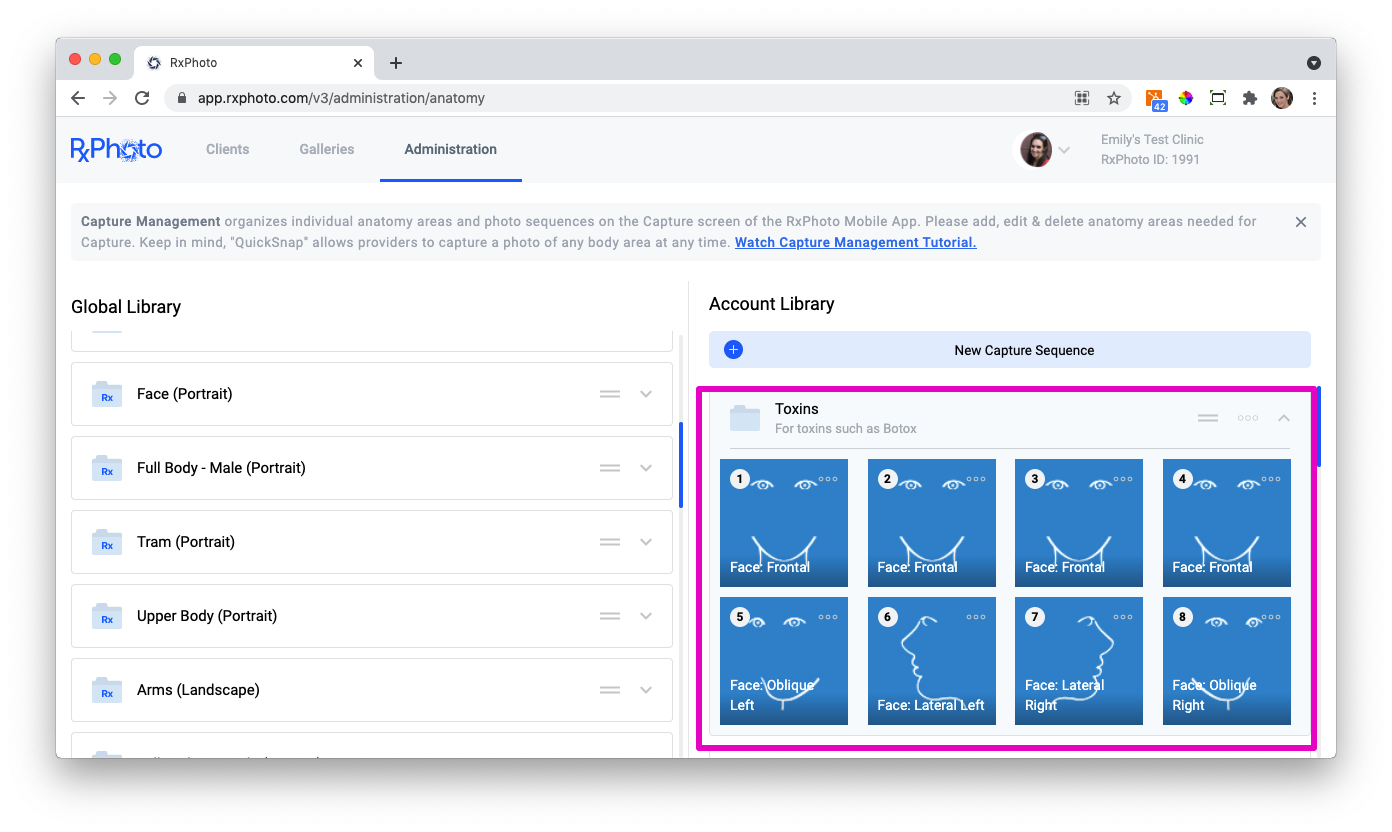
The "Global Library" on the left side of the screen shows all available on-screen guides, organized by Anatomy Area.
-
The "Account Library" on the right side of the screen shows all Custom Capture Sequences available on the RxPhoto Mobile App on the device (iPhone/iPad) for the practice.
Default Sequences
New practices will have the following Capture Sequences as defaults in their accounts:
-
Full Body - Male (Portrait)
-
Face (Portrait)
-
Lips (Portrait)
-
Arms (Landscape)
-
Upper Body (Portrait)
-
Tram (Portrait)
-
Abdomen (Landscape)
-
Lower Extremity (Portrait)
Legacy practices (any practice that had been using RxPhoto prior to July 12th, 2021), will see the same Capture Sequences as before the update. Note that the "Heads, Trunks, Legs" areas have been renamed "Head Area," "Trunk Area," and "Legs Area" respectively.
How to Create New Custom Capture Sequences
New Custom Capture Sequences may be created on the
RxPhoto Website
, which is accessible from any computer browser.
Step 1: Create the Anatomy Area
1. Log in to the RxPhoto Website from any computer browser.
2. Navigate to the "Administration" tab at the top of the screen and click on "Custom Anatomy Areas and Sequences."
3. Click the "New Capture Sequence" button.
5. In the pop-up, name the Capture Sequence (required), and add a description (optional.
6. Click "Save" to create the Capture Sequence.
The newly created sequence will be at the top of the Account Library list.
Step 2: Add On-Screen Guides
1. Click on the newly created sequence name to open the folder. It will be empty.
2. Find the desired on-screen guide(s) from the Global Library on the left side of the screen. To view guides, click on an Anatomy Area to open the folder.
3. Click on desired on-screen guide(s). Note that guides can be chosen from multiple different Anatomy Areas at once.
4. Click "Add To" or drag & drop into desired Account Library folder. If dragging & dropping, skip to step 6.
5. Click on the Capture Sequence where the on-screen guides should be added to, then click "Add."
6. The selected on-screen guides will now be viewable in the Custom Capture Sequence in the Account Library.
Step 2a. Add the Same On-Screen Guide Multiple Times
To add multiple of the same on-screen guide to a sequence:
1. Click to select the desired on-screen guide from the Global Library.
2. Click "Add To" or drag & drop into desired Account Library folder. If dragging & dropping, skip to step 4.
3. Click on the Capture Sequence where the guide should be added.
4. Repeat steps 1-3 until the desired number of the on-screen guide have been added.
Step 3: Refresh the Capture Sequence List on the Device (iPhone/iPad)
1. Log in to the RxPhoto Mobile App on the device (iPhone/iPad).
2. Enter any client's record and access the Capture section of the Client Record.
3. Swipe down with your finger across the list of Capture Sequences until the spinning wheel appears.
4. Please wait a few moments for the screen to refresh. Once done, the new Capture Sequence will appear.
How to Rename On-Screen Guides and Capture Sequences
Rename On-Screen Guides
On-screen guides will have the default name attached to them, but they may be renamed once added to a Custom Capture Sequence in the Account Library. To rename an on-screen guide:
1. Log in to the RxPhoto Website from any computer browser.
2. Navigate to the "Administration" tab at the top of the screen and click on "Custom Anatomy Areas and Sequences."
3. Click on the appropriate Custom Capture Sequence from the list under Account Library to view associated on-screen guides.
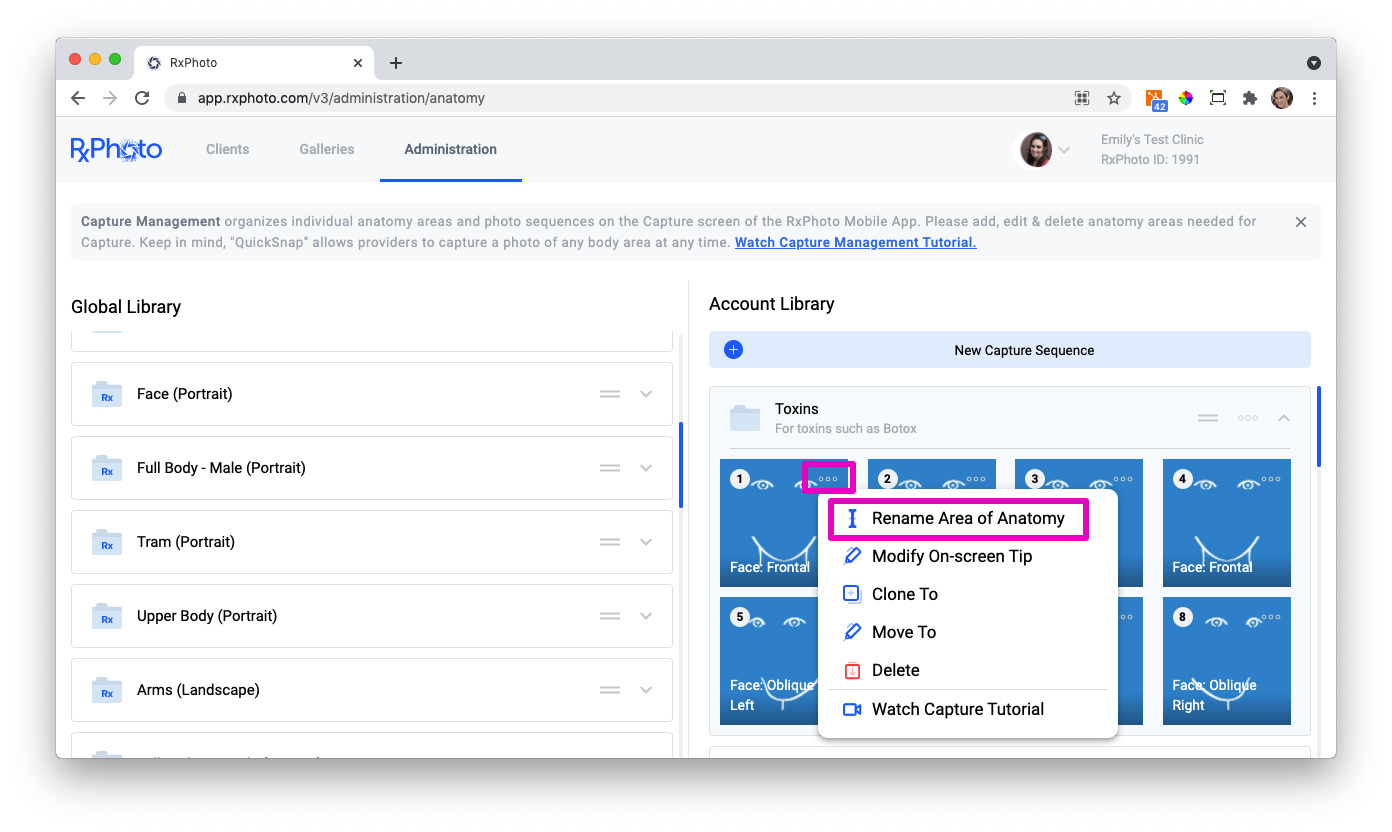
4. Click on the three dots on the upper right corner of the thumbnail.
5. Click to select "Rename Area of Anatomy."
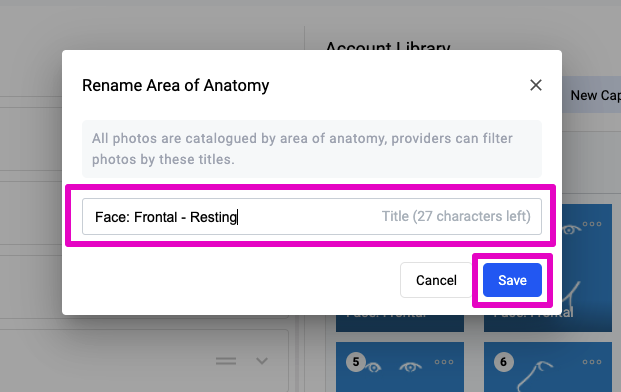
6. Type in desired name and click "Save."
7. Refresh Capture Sequence list on the RxPhoto Mobile App on the Device (iPhone/iPad) for the changes to take effect. See "Step 3: Refresh Capture Sequence List on Device (iPhone/iPad)" for details.
Rename Capture Sequences
Any Capture Sequence, default or custom, may be renamed.
1. Log in to the RxPhoto Website from any computer browser.
2. Navigate to the "Administration" tab at the top of the screen and click on "Custom Anatomy Areas and Sequences."
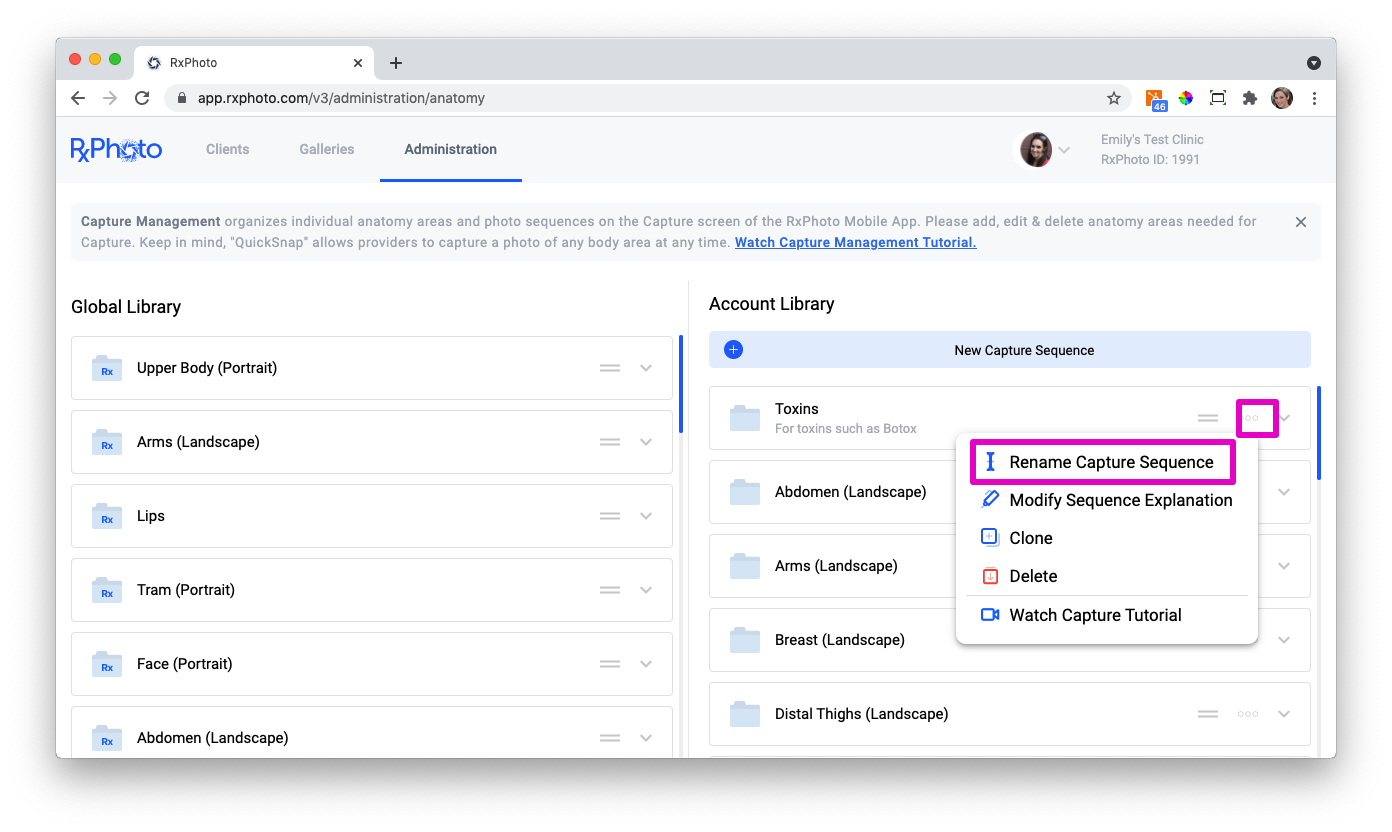
3. Click on the three dots on the right side of the Capture Sequence to be renamed.
4. Click to select, "Rename Capture Sequence."
5. Type in the new name in the pop-up and click "Save" when done.

6. Refresh Capture Sequence list on the RxPhoto Mobile App on the Device (iPhone/iPad) for the changes to take effect. See "Step 3: Refresh Capture Sequence List on Device (iPhone/iPad)" for details.
Rearrange On-Screen Guides and Capture Sequences
Rearrange On-Screen Guides
1. Log in to the RxPhoto Website from any computer browser.
2. Navigate to the "Administration: tab at the top of hte screen and click on "Custom Anatomy areas and Sequences."
3. Click on the sequence name to view on-screen guides.
4. Click to select an on-screen guide(s).
5. Click to drag & drop the guide(s) to new position.
6. Refresh Capture Sequence list on the RxPhoto Mobile App on the Device (iPhone/iPad) for the changes to take effect. See "Step 3: Refresh Capture Sequence List on Device (iPhone/iPad)" for details.
Rearrange Capture Sequences
1. Log in to the RxPhoto Website from any computer browser.
2. Navigate to the "Administration" tab at the top of the screen and click on "Custom Anatomy Areas and Sequences."
3. Click on the two lines to the right of the name of the Sequence to be moved.
4. Drag & drop the Sequence to its new position.
5. Refresh Capture Sequence list on the RxPhoto Mobile App on the Device (iPhone/iPad) for the changes to take effect. See "Step 3: Refresh Capture Sequence List on Device (iPhone/iPad)" for details.
Related Articles
Customize Capture Sequences
The upgraded RxPhoto Custom Capture Sequences allow practice to create Custom Capture Sequences using any of RxPhoto's on-screen guides. With the update, practices can create Custom Capture Sequences with more specificity. For example: Botox (with ...New! Background Removal
RxPhoto has recently added a new background removal tool with the release of RxPhoto 4.4.3. Background removal allows providers to capture photos anywhere and still have beautiful , uncluttered backgrounds. There are two ways to use background ...How to Use Photo Sequences
Photo sequences are lists to help guide you to take all of the necessary photos before and after each procedure. Sequences are grouped under three major anatomical regions. Head, trunk (which also includes arms) and legs. For example, let's choose ...Navigate the Capture Screen
The capture screen is your starting point for capturing photos of the client, writing notes, signing forms, and accessing all data on a particular client. Navigate to a client's capture screen from the client list by pressing on a client's name. This ...Create a New Client
RxPhoto allows you to create a new client directly from the RxPhoto app on your device (iPhone/iPad), so that you do not need to do any prep work on your backend before a consult's appointment. Please note that if you have an integration, adding a ...